I remember standing at a beautiful lake at sunrise, camera in hand, trying to capture the perfect reflection of the mountains in the water. I had my ND filter attached, expecting magic to happen.
But something wasn’t quite right—the reflections looked different than I expected. That’s when I realized I might be confusing what ND filters actually do.
If you’re a photographer exploring the world of filters, you’ve probably wondered about the relationship between ND filters and reflections. In this blog post, my goal is simple—to clear up the confusion about ND filters and reflections so you can use the right tool for the right job.
By understanding what ND filters actually do versus what other filters accomplish, you’ll be equipped to capture stunning images in any lighting condition.
Let’s dive into the world of neutral density filters, explore their true purpose, and answer the important question of whether they remove reflections. I want to give you clarity so you can make informed decisions about your photography gear and techniques.
Understanding ND Filters and Their Purpose
Before we tackle the reflection question, it’s essential to understand what ND filters are designed to do. These popular photography accessories serve a specific and valuable purpose that every photographer should understand.
What ND Filters Actually Do?
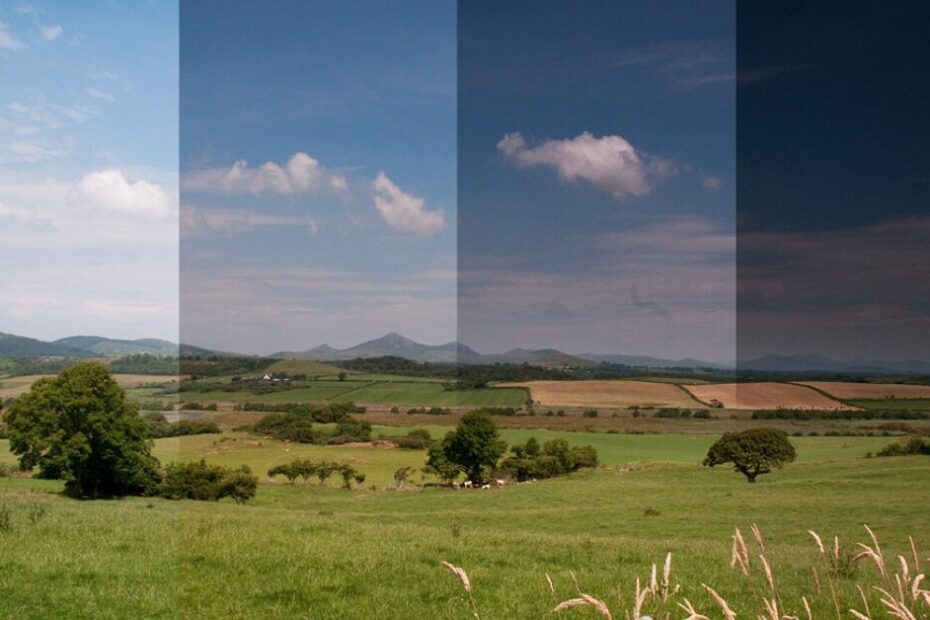
Neutral density filters are essentially sunglasses for your camera lens. They reduce the amount of light entering your lens without affecting the color or quality of that light.
The “neutral” part means they don’t add color casts or change the tones in your image—they simply make everything darker by blocking light uniformly across the entire spectrum.
Think of it like dimming a light switch. The color of the light doesn’t change; there’s just less of it reaching your camera’s sensor.
Why Photographers Use ND Filters
The primary reason to use an ND filter is to allow longer exposures or wider apertures in bright conditions. Want to capture that silky smooth waterfall effect in the middle of a sunny day? Need to shoot at f/1.8 for beautiful bokeh in bright sunlight without overexposing? ND filters make these scenarios possible.
They’re also essential for video work when you want to maintain a specific shutter speed (usually double your frame rate) for natural motion blur, even in bright conditions. Without an ND filter, you’d be forced to use faster shutter speeds that create choppy, unnatural-looking video.
Different Strengths for Different Needs
ND filters come in various strengths, measured in stops of light reduction. A 3-stop ND filter reduces light by three exposure values, a 6-stop creates even more dramatic reduction, and 10-stop filters allow for those dreamy long exposures in daylight that turn moving clouds into streaks and crowds of people into ghosts.
This versatility makes ND filters incredibly valuable for creative photography, allowing you to control exposure and motion blur in ways that would otherwise be impossible in bright lighting.
The Creative Control Factor
Beyond the technical benefits, ND filters give you creative freedom. They let you shoot with the settings you want rather than being forced into settings dictated by bright light. You can maintain your desired depth of field, capture motion in your preferred way, and execute your creative vision regardless of lighting conditions.
By understanding that ND filters are all about light reduction and exposure control, you’re better equipped to use them effectively and understand their limitations—which brings us to our main question about reflections.
Does ND Filter Remove Reflection?
No, ND filters do not remove reflections. This is a common misconception among photographers, but it’s important to understand that ND filters and reflection removal are two completely different functions requiring different types of filters.
ND filters reduce light intensity uniformly across your entire image. They don’t discriminate between reflected light and direct light—they simply make everything darker. When you attach an ND filter to your lens, reflections on water, glass, or other surfaces remain just as visible as before; they’re just darker along with everything else in the scene.
The filter that actually removes or reduces reflections is a polarizing filter, specifically a circular polarizing filter (CPL) for most modern cameras.
Polarizing filters work on an entirely different principle—they filter out light waves vibrating in certain directions, which is exactly what reflected light does.
Here’s the key difference: reflections are created by polarized light. When light bounces off non-metallic surfaces like water, glass, leaves, or painted surfaces, it becomes polarized, meaning the light waves align in a specific direction.
A polarizing filter can block these aligned light waves while allowing non-polarized light to pass through, effectively reducing or eliminating reflections.

So if you’re shooting through a window, trying to see through water surface reflections, or wanting to reduce glare on leaves for richer colors, you need a polarizing filter, not an ND filter.
The polarizer can be rotated to adjust the amount of reflection removal, giving you creative control over how much of the reflection you want to keep or eliminate.
It’s worth noting that some photographers use both filters together—a polarizer to control reflections and colors, and an ND filter to control exposure. Many filter systems allow you to stack filters, though this can sometimes introduce vignetting or reduce image quality, so use this approach thoughtfully.
Factors to Consider When Choosing Filters
Understanding the differences between filter types helps you select the right tool for your specific photography needs. Let’s explore the key considerations that should guide your filter choices.
Your Primary Photography Goals
What are you trying to achieve? Long exposures in daylight require ND filters. Removing reflections, reducing glare, and enhancing sky saturation call for polarizing filters.
Protecting your lens suggests a UV or clear filter. Define your main objectives before investing in filters, as this ensures you’re buying tools that actually serve your needs.
Lighting Conditions You Shoot In
If you primarily shoot in bright outdoor conditions and want creative control over exposure, ND filters become essential. If you often photograph landscapes with water, shoot through windows, or want to enhance colors by reducing atmospheric haze, a polarizing filter should be your first investment.
Many photographers find that a polarizing filter gets used more frequently than ND filters because it addresses multiple common situations—reflection control, color saturation, and sky enhancement—making it a versatile addition to your kit.
Quality and Color Neutrality
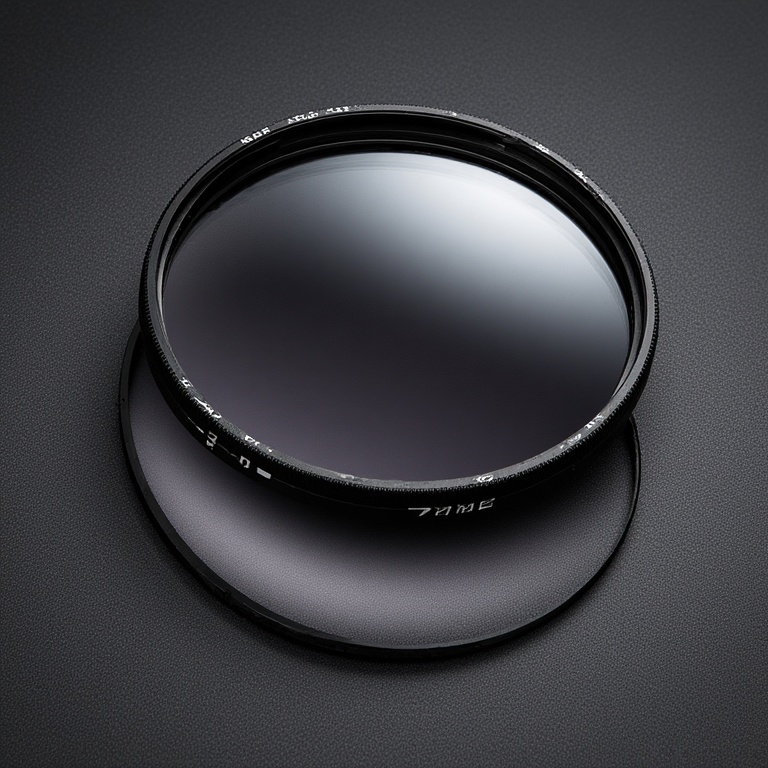
Not all filters are created equal. Cheap filters can introduce color casts, reduce sharpness, and create unwanted flare or ghosting in your images. When investing in filters, prioritize quality glass with multi-coating to minimize these issues. Your expensive lens deserves a quality filter in front of it.
For ND filters especially, color neutrality is crucial. Some lower-quality ND filters add blue, magenta, or other color tints to your images, requiring color correction in post-processing. Quality neutral density filters maintain accurate color rendition even while reducing light.
Filter System Compatibility
Consider whether you want screw-on filters that attach directly to your lens threads or a holder system that uses square or rectangular filters.
Screw-on filters are convenient and lens-specific, while holder systems offer more flexibility across multiple lens sizes and make stacking filters easier.
Holder systems are popular among landscape photographers who frequently combine graduated ND filters with polarizers or solid ND filters for maximum creative control.
Budget and Investment Strategy
Filters represent a significant investment, especially quality ones. Prioritize based on your actual shooting needs rather than buying every filter type immediately. Start with the filter that addresses your most common challenge, then expand your collection as your photography evolves and new needs emerge.
Remember that quality filters retain their value and can last a lifetime with proper care, making them a worthwhile investment for serious photographers.
Practical Tips for Filter Use
To get the most from your filters and avoid common mistakes, follow these proven guidelines that professional photographers rely on.
1. Match the Filter to the Task
Use ND filters when you need to reduce light for exposure control—nothing more, nothing less. Use polarizing filters when you want to control reflections, reduce glare, or enhance colors. Using the wrong filter wastes time and won’t achieve your desired result.
2. Learn Your Polarizer’s Sweet Spot
Polarizing filters work best at approximately 90 degrees to the sun. Point at the sun, then rotate 90 degrees left or right—that’s where you’ll see maximum polarization effect. At other angles, the effect diminishes. Understanding this helps you position yourself for optimal reflection control.
3. Watch for Uneven Polarization
When using wide-angle lenses with polarizing filters, you might notice uneven polarization across your sky, with one area appearing much darker than another. This happens because different parts of the sky are at different angles to the sun. Be mindful of this effect when composing your shots.
4. Clean and Protect Your Filters
Filters attract dust, fingerprints, and smudges just like your lens. Keep them clean with proper lens cleaning supplies, and store them in protective cases when not in use. Scratched or dirty filters degrade image quality more than you might expect.
5. Remove When Not Needed
While it’s tempting to leave a filter on for protection, remove it when it’s not serving a purpose. Every additional piece of glass can potentially reduce sharpness, increase flare, or create unwanted reflections in certain lighting conditions. Use filters intentionally, not habitually.
Conclusion
ND filters do not remove reflections—they simply reduce the amount of light entering your lens without discriminating between reflected and direct light. If you want to control or eliminate reflections, you need a polarizing filter, which works through an entirely different mechanism by filtering polarized light waves.
Understanding the difference between these filter types is crucial for achieving your creative vision. ND filters excel at exposure control and enabling long exposures or wide apertures in bright conditions, while polarizing filters manage reflections, reduce glare, and enhance color saturation.
By choosing the right filter for your specific needs—considering your photography goals, shooting conditions, quality requirements, and budget—you’ll expand your creative possibilities and capture images that truly reflect your vision.
Both filter types have their place in a photographer’s kit, and knowing when to use each one is the key to photographic success.
Pingback: Does ND Filter Reduce Sharpness? Unless You USE